
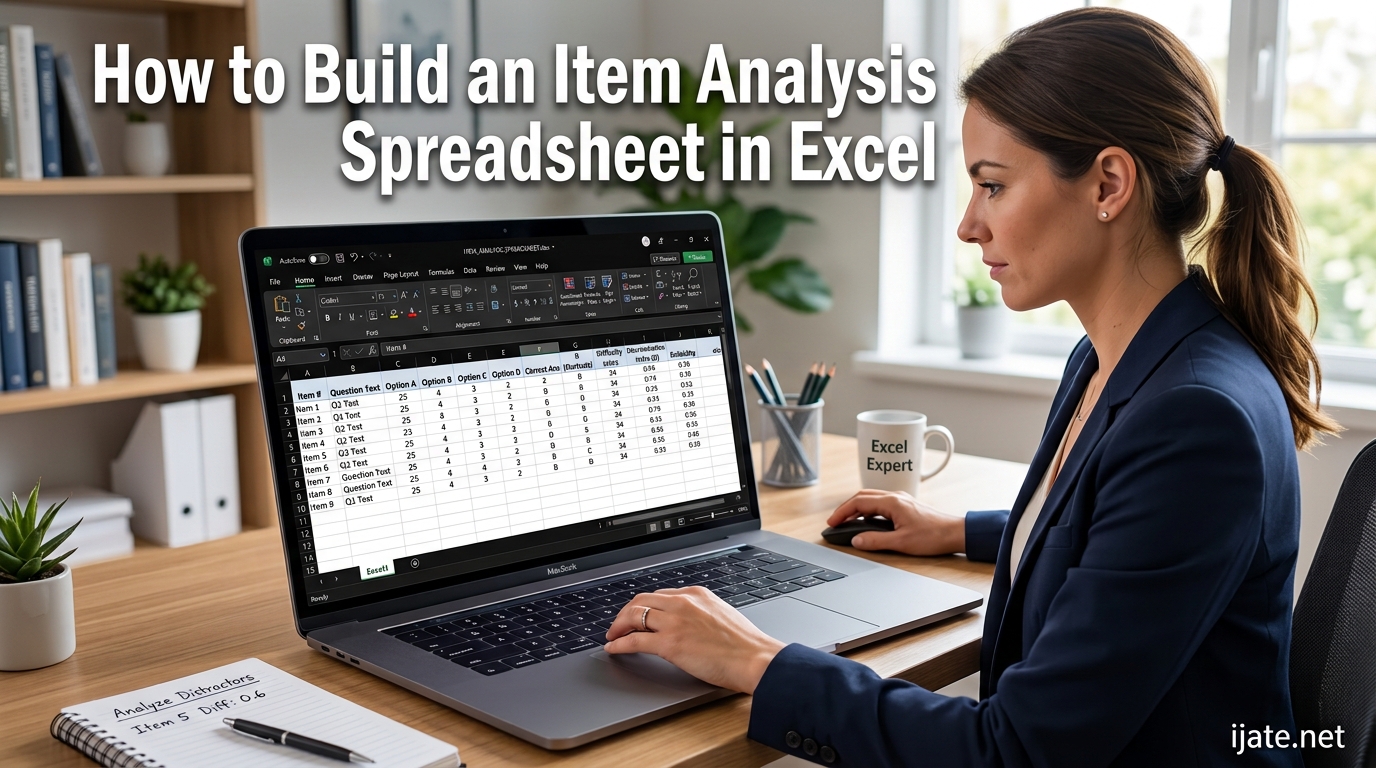
Item analysis is a statistical method that helps teachers and test developers evaluate the quality of individual test questions by measuring difficulty, discrimination, and distractor performance. When you build a simple item analysis spreadsheet in Excel, you turn raw student response data into clear numbers that show which questions worked, which ones flopped, and which distractors confused the right students for the wrong reasons. You do not need paid software, add-ins, or a statistics degree to do this. All you need is Excel (or Google Sheets), basic formula knowledge, and a structured approach.
Our team has used this exact spreadsheet method with classroom placement tests of 20 to 40 items and 30 to 80 students. The process takes about 30 to 45 minutes the first time you build it. After that, you can reuse the same template for every exam by pasting in new response data. This guide walks through every step with real cell references, exact formulas, plain-language explanations, and a troubleshooting section for the errors beginners hit most often.
Whether you teach in a university, a language school, a K-12 classroom, or a corporate training program, learning how to build a simple item analysis spreadsheet in Excel gives you a repeatable way to improve your tests over time. By the end of this article, you will be able to calculate item facility, item discrimination, distractor efficiency, test reliability (KR-21), and the standard error of measurement, then use those numbers to decide which items to keep, revise, or throw away.
Table of Contents
What You Will Need Before You Start
The beauty of this method is how little you actually need. Here is the full list of prerequisites.
- Microsoft Excel (2016 or later) or Google Sheets. All formulas in this guide work in both. LibreOffice Calc also works with minor adjustments.
- A scored multiple-choice test with one correct answer per item. The method works best with 4 or 5 options (A through D or A through E).
- Student response data. You need a record of which letter each student chose for each item. This can come from a Scantron, an online quiz platform export, or manual entry.
- Basic formula comfort. If you can use COUNTIF, AVERAGE, and copy-paste formulas with absolute references (the dollar sign trick), you can do this entire walkthrough.
- At least 20 students and 15 items. Item statistics get unstable with very small groups. Twenty students is a practical minimum for meaningful discrimination calculations.
That is it. No Real Statistics add-in, no SPC for Excel, no Data Analysis Toolpak required. We will build everything from native formulas.
Quick Overview: The Item Analysis Workflow
If you want the short version before we get into cell-by-cell detail, here is the complete workflow in seven steps.
- Set up your spreadsheet columns in Part A: one row per student, one column per item, plus a column for the answer key row.
- Enter student responses as letters (A, B, C, D) and place the correct answer key in a dedicated row at the top or bottom of the data block.
- Calculate item facility (difficulty index) for each item using COUNTIF to count correct responses, divided by total student count.
- Score and rank students in Part B by converting letters to 1 or 0 with an IF formula, summing total scores, and sorting from highest to lowest.
- Calculate item discrimination by comparing the proportion correct in the top third of scorers versus the bottom third.
- Analyze distractor performance by counting how many students chose each wrong option, ideally with at least some lower-performing students selecting each distractor.
- Calculate test reliability (KR-21) and standard error of measurement using the variance of total scores, the number of items, and the mean score.
Those seven steps are the entire item analysis process. The rest of this guide explains each one with exact Excel formulas, cell references, and interpretation guidance.
How to Build a Simple Item Analysis Spreadsheet in Excel (Step-by-Step)
This is the core of the guide. We will use a running example throughout: a 20-item multiple-choice test taken by 40 students. Adjust the numbers to match your own data.
Step 1: Set Up Your Spreadsheet Columns (Part A – Raw Response Data)
Open a blank Excel workbook and name the first sheet “PartA”. This sheet holds the raw letter choices each student made. We will create a separate Part B for scored numeric data.
In cell A1, type “Student”. In cells B1 through U1, type “Q1”, “Q2”, “Q3”, and so on up to “Q20”. These are your item headers.
In cells A2 through A41, enter student identifiers. These can be names, ID numbers, or just “S1” through “S40”. The key is that each row represents one student’s complete set of answers.
Now reserve a row for the answer key. The cleanest approach is to put it in row 42, just below the last student. Label cell A42 as “Answer Key” and enter the correct letter for each item across B42 through U42. For example, if the correct answer to Q1 is C, type “C” in cell B42.
Your layout now looks like this: 40 rows of student responses in rows 2 through 41, and one answer key row in row 42. This is the foundation for everything else.
One small tip that saves hours later: format the answer key row with a different fill color (light yellow works well) so you never accidentally sort it into your student data.
Step 2: Enter Student Responses and the Answer Key
Type each student’s letter choice for each item into the corresponding cell. If Student 1 chose B for Q1, type “B” in cell B2. If Student 1 chose C for Q2, type “C” in cell C2. Continue until all 40 students by 20 items are filled in.
Use uppercase letters consistently. Excel treats “a” and “A” as different values in COUNTIF comparisons, and inconsistent casing is one of the most common reasons formulas return zero when they should not.
If your data comes from an online platform like Google Forms, Canvas, or Moodle, you can usually export it as a CSV file and paste directly into this layout. Just make sure the column order matches your Q1 through Q20 headers.
Once Part A is complete, take a moment to proofread. A single mistyped letter can throw off the analysis for that entire item. Scan each column to confirm every entry is A, B, C, or D (or whichever options your test uses).
Step 3: Calculate Item Facility (Difficulty Index) Using COUNTIF
Item facility, also called the difficulty index or IF, tells you what proportion of students answered each item correctly. The word “difficulty” can be confusing because a high IF means the item was easy. A low IF means it was hard.
Create a new area below your data, starting around row 45. In cell A45, type “Item Facility”. In cells B45 through U45, you will enter one formula per item.
For Q1 (column B), the formula is:
=COUNTIF(B2:B41, B$42) / COUNTA(B2:B41)
Let us break that down. COUNTIF(B2:B41, B$42) counts how many students in rows 2 through 41 gave the same answer as the answer key in row 42. The dollar sign before the row number (B$42) locks the reference so it always points to the answer key row when you copy the formula across.
COUNTA(B2:B41) counts the total number of non-empty cells in that column, which equals the number of students who attempted the item. Dividing the two gives you a proportion between 0 and 1.
Copy this formula from B45 across to U45 to calculate item facility for all 20 items. Format the row as a percentage for easier reading.
Here is what the numbers mean. An IF of 0.85 means 85 percent of students got the item right, so it was easy. An IF of 0.30 means only 30 percent got it right, so it was hard. Most testing guidelines, including Brown’s criteria referenced in the JALT item analysis literature, suggest an acceptable range of 0.30 to 0.70 for norm-referenced tests.
Step 4: Score and Rank Students (Part B – Scored Data)
To calculate item discrimination, you need to know which students are your strongest and weakest performers. That requires converting letter answers to numeric scores, which means building Part B.
Create a new sheet called “PartB”. Set up the same column headers: “Student” in A1, then Q1 through Q20 in B1 through U1, and “Total Score” in V1.
In cell B2 of PartB, enter this formula:
=IF(PartA!B2 = PartA!B$42, 1, 0)
This compares the student’s answer in Part A to the answer key. If they match, the student gets 1 point. If not, they get 0. Copy this formula across all 20 item columns and down all 40 student rows.
In cell V2 (the Total Score column), enter:
=SUM(B2:U2)
This gives each student a total score out of 20. Copy it down for all 40 students. Now you know exactly who your top and bottom performers are.
The next step is sorting. Click anywhere inside your data block, then go to Data > Sort. Sort by Total Score in descending order (largest to smallest). After sorting, your strongest students are at the top and your weakest are at the bottom.
With 40 students, the top third is roughly the top 13 students (rows 2 through 14) and the bottom third is the bottom 13 students (rows 29 through 41). The middle 14 students are excluded from discrimination calculations.
Step 5: Calculate Item Discrimination (Top/Bottom Group Method)
Item discrimination, abbreviated ID, measures how well an item separates students who know the material from students who do not. A high discrimination index means the strong students got it right and the weak students got it wrong. A low or negative index means the item is not doing its job.
There are several ways to calculate discrimination. The simplest and most widely used in classroom settings is the top-third minus bottom-third method, sometimes called the upper-lower group method.
In PartB, create a summary area starting around row 45. In cell A45 type “Top Third Correct”, in A46 type “Bottom Third Correct”, and in A47 type “Discrimination Index”.
For Q1 in cell B45, count how many of the top 13 students got the item right:
=SUM(B2:B14)
In cell B46, count how many of the bottom 13 students got it right:
=SUM(B29:B41)
In cell B47, calculate the discrimination index:
=(B45 - B46) / 13
This gives you a value between -1.0 and +1.0. A discrimination index of 0.40 or above is considered excellent. Anything between 0.30 and 0.39 is good. Values between 0.20 and 0.29 are fair and may need revision. Anything below 0.20 is poor and should be revised or removed. Negative discrimination is a red flag: it means weak students outperformed strong students on that item, which usually indicates a confusing question, an ambiguous correct answer, or a misaligned answer key.
Note that some sources recommend using the top and bottom 27 percent of students instead of thirds, following Ebel’s guidelines. Both methods work. The third method is simpler for small classes because it gives you more students in each group, which makes the index more stable.
Step 6: Analyze Distractor Performance
Item facility and discrimination tell you whether an item is working overall. Distractor analysis goes one level deeper by telling you whether each individual wrong answer is doing its job.
A good distractor should attract more weak students than strong students. If nobody picks a distractor, it is not contributing to the test. If strong students pick a distractor more often than weak students, the distractor may be misleading or based on a misconception.
To analyze distractors, go back to Part A where you have the raw letter data. Below your item facility row, create a small table. For Q1 (column B), count how many students chose each option:
Choice A: =COUNTIF(B2:B41, "A")
Choice B: =COUNTIF(B2:B41, "B")
Choice C: =COUNTIF(B2:B41, "C")
Choice D: =COUNTIF(B2:B41, "D")
These four counts should add up to 40 (or however many students you have). The correct answer should have the highest count for a well-functioning item. Each distractor should attract at least a few students, ideally around 5 percent of the class or more. A distractor chosen by zero students is doing nothing and should be replaced.
For a deeper analysis, split the counts by group. Count how many of the top 13 students chose each distractor versus how many of the bottom 13 chose each one. If strong students are picking a particular wrong answer, that distractor may be too plausible or based on a subtle misunderstanding worth addressing in class.
Distractor efficiency is sometimes expressed as a percentage. If all three wrong options on a four-option item attract at least one student, the item has 100 percent distractor efficiency. If two of three distractors attract nobody, efficiency drops to 33 percent.
Step 7: Calculate Test Reliability (KR-21) and Standard Error of Measurement
Now that you have item-level statistics, you can calculate two whole-test statistics: the Kuder-Richardson 21 (KR-21) reliability coefficient and the standard error of measurement (SEM). Both tell you something about the test as a whole rather than individual items.
The KR-21 formula estimates internal consistency reliability for tests scored as right or wrong (binary items). It is simpler than KR-20 and Cronbach’s Alpha, which is why it works well for a beginner Excel spreadsheet.
The KR-21 formula in statistical notation is:
KR-21 = (k / (k - 1)) * (1 - (mean * (k - mean)) / (k * variance))
Where k is the number of items, mean is the average total score, and variance is the variance of total scores.
In Excel, assume your total scores are in PartB cells V2 through V41. Here are the formulas:
Number of items: =20 (or type the number directly, or use =COUNTA(B1:U1))
Mean score: =AVERAGE(PartB!V2:V41)
Variance: =VAR.P(PartB!V2:V41) (use VAR.P for population variance, or VAR.S if you treat this class as a sample)
Now assemble the KR-21 formula. Assuming you placed k in cell B50, mean in B51, and variance in B52:
=(B50 / (B50 - 1)) * (1 - (B51 * (B50 - B51)) / (B50 * B52))
A KR-21 value above 0.80 indicates good reliability for a classroom test. Values between 0.60 and 0.79 are acceptable for teacher-made tests. Below 0.60 suggests the test has too much measurement error, often because of too few items, poorly discriminating items, or a test that is too easy or too hard.
The standard error of measurement estimates how much a student’s observed score might fluctuate from their true score due to random measurement error. The SEM formula is:
SEM = SD * SQRT(1 - KR-21)
Where SD is the standard deviation of total scores. In Excel:
Standard deviation: =STDEV.P(PartB!V2:V41)
SEM (assuming KR-21 is in cell B53 and SD is in cell B54): =B54 * SQRT(1 - B53)
Interpret SEM like this: if a student scores 16 out of 20 and your SEM is 1.2, you can be reasonably confident their true score falls somewhere between roughly 14.8 and 17.2. This matters most for borderline placement decisions where a student is right on the cutoff between two levels.
How to Interpret Your Item Analysis Results
Once you have item facility, item discrimination, distractor counts, KR-21, and SEM, the next question is what to actually do with those numbers. Here are quick-reference tables for the two most important statistics.
Item Facility (Difficulty Index) Interpretation
Use this table to classify each item by its difficulty level based on Brown’s IF criteria commonly referenced in classroom testing literature.
- 0.85 to 1.00 (Very Easy): Consider revising to add more challenge, unless the item is intentionally easy as a warm-up.
- 0.70 to 0.84 (Easy): Acceptable, especially for early items that build confidence.
- 0.30 to 0.69 (Moderate): The ideal range for norm-referenced tests. These items discriminate best.
- 0.10 to 0.29 (Hard): May be acceptable if the test is criterion-referenced and the material is genuinely advanced. Otherwise, revise.
- 0.00 to 0.09 (Very Hard): Almost everyone got it wrong. Check for a miskeyed answer, confusing wording, or content that was never taught.
Item Discrimination Interpretation
Discrimination is generally considered more important than facility because it tells you whether the item separates knowledgeable students from less knowledgeable ones.
- 0.40 and above (Excellent): The item is doing exactly what it should. Keep it.
- 0.30 to 0.39 (Good): Solid item with minor room for improvement. Keep it.
- 0.20 to 0.29 (Fair): The item may need revision. Check distractor performance and wording.
- 0.10 to 0.19 (Poor): The item is barely discriminating. Revise or replace.
- Below 0.10 (Very Poor): The item is not measuring what you intended. Remove it or rewrite it entirely.
- Negative (Reversed): Weak students outperformed strong students. Investigate immediately for a miskeyed answer, trick question, or ambiguous wording.
A common rule of thumb is that a test should have at least 70 percent of its items scoring above 0.30 on discrimination for the overall reliability to be acceptable.
What to Do with Poorly Performing Items
Item analysis only helps if you act on the results. Here is a practical decision framework.
If an item has good discrimination but is very easy (IF above 0.85): Keep it but consider whether it adds useful information. Easy items at the start of a test can reduce anxiety, so they are not always wasteful.
If an item has good discrimination but is very hard (IF below 0.20): Check whether the content was actually taught. If yes, keep the item but review the wording. If no, remove the item from the scored portion of the test.
If an item has poor discrimination (below 0.20) but acceptable facility: The item is probably ambiguous. Look at the distractor analysis. If two wrong options are attracting strong students, one of them may be arguable as a second correct answer. Reword the stem or sharpen the distractors.
If an item has negative discrimination: Stop and investigate before doing anything else. Check whether the answer key is correct. Then check whether the question was misread by students due to unclear wording. A negatively discriminating item is almost always a sign of a problem with the item, not with the students.
If a distractor was chosen by zero students: Replace it with a more plausible wrong answer based on a common misconception. Use student interviews or class discussion to identify what misconceptions are common, then build distractors around them.
Document every change you make. When you give the test again next semester, you can compare the new item statistics to the old ones to see if your revisions actually improved the item.
Common Excel Errors and How to Fix Them
Building an item analysis spreadsheet from scratch means you will probably hit a few formula errors. Here are the ones we see most often, with fixes.
#DIV/0! error in your item facility row: This means COUNTA returned zero, which happens when the column is empty or when your range reference is wrong. Check that the range in your COUNTIF and COUNTA formulas actually covers your student data rows.
Item facility returns 0 for every item: Almost always a casing mismatch. If students typed lowercase “a” but your answer key has uppercase “A”, COUNTIF treats them as different. Fix by reformatting all entries to uppercase, or use the formula =COUNTIF(B2:B41, UPPER(B$42)) to force a case-insensitive match.
Discrimination index is 0 for every item: Your sort did not work, or you are summing the wrong rows. After sorting by Total Score descending, confirm that row 2 is your highest scorer and row 41 is your lowest. Then verify your SUM ranges match the top 13 and bottom 13 rows.
Sort scrambles your answer key row into student data: This happens if the answer key row was inside the range you sorted. Always keep the answer key outside the sortable range, or freeze it in a separate column using absolute references.
KR-21 returns a negative number: This usually means variance is too low because the test was extremely easy or extremely hard, so everyone got nearly the same score. Check the mean: if it is very close to 0 or very close to the maximum score, the test lacks spread and reliability will be low regardless of formula accuracy.
Formulas return wrong values after adding more students: Your ranges are hardcoded. Use Excel Tables (Ctrl+T) or dynamic ranges so formulas auto-expand. Alternatively, build formulas with extra rows of buffer space from the start.
Google Sheets Alternative Formulas
Every formula in this guide works identically in Google Sheets. COUNTIF, COUNTA, AVERAGE, SUM, IF, STDEV.P, VAR.P, and SQRT all use the same syntax. The only difference is how you access sorting: in Google Sheets, use Data > Sort range instead of the Excel ribbon.
If you prefer to collaborate with co-teachers in real time, Google Sheets is actually the better choice for this spreadsheet. Multiple people can enter student responses simultaneously, and the formulas update live for everyone.
One caution: Google Sheets handles very large datasets (thousands of rows) more slowly than Excel. For a typical classroom test with 40 students and 20 items, performance is identical. For a district-wide analysis with hundreds of students, stick with Excel.
Frequently Asked Questions
How to make an item sheet in Excel?
Open a blank workbook, label column A as Student and columns B onward as Q1, Q2, Q3. Enter one student per row with their letter choices. Add an answer key row below the data. Then use COUNTIF to calculate item facility and an IF formula to score responses in a second sheet.
Can ChatGPT build an Excel model for item analysis?
ChatGPT can generate formulas and explain the structure of an item analysis spreadsheet, but it cannot create a working .xlsx file with your actual data entered. You still need to set up the columns, paste in student responses, and verify each formula works with your specific cell references.
How to make quick analysis in Excel?
Use the Analyze Data button on the Home tab (formerly Ideas) for instant summaries, or use the Data Analysis Toolpak for descriptive statistics. For item analysis specifically, the COUNTIF and IF formula method described in this guide is faster and more transparent than built-in tools.
What is a good item discrimination index?
An item discrimination index of 0.40 or above is excellent, 0.30 to 0.39 is good, 0.20 to 0.29 is fair and may need revision, and anything below 0.20 is poor. A negative discrimination index indicates a serious problem with the item that requires immediate investigation.
What is the KR-21 formula in Excel?
KR-21 equals (k divided by k minus 1) times (1 minus (mean times k minus mean) divided by (k times variance)), where k is the number of items, mean is the average total score, and variance is the population variance of total scores. In Excel, use AVERAGE for the mean and VAR.P for the variance.
When should I remove a test item from my exam?
Remove an item if it has a discrimination index below 0.10, a negative discrimination index, an item facility below 0.10 with no clear teaching justification, or distractors that attract zero students. Always investigate negative discrimination before removing, as it may indicate a miskeyed answer rather than a bad question.
Conclusion
Building a simple item analysis spreadsheet in Excel comes down to seven repeatable steps: set up columns, enter responses, calculate item facility, score and rank students, calculate discrimination, analyze distractors, and compute reliability with KR-21 and SEM. Once you have the template built, you can reuse it for every exam by pasting in new response data.
The numbers this spreadsheet produces are only useful if you act on them. Revise items with discrimination below 0.20, replace empty distractors, investigate negative discrimination immediately, and document every change so you can track improvement across semesters. Over two or three test cycles, your assessments will become noticeably more reliable and fair.
If you want to go deeper after mastering this spreadsheet, the next steps are exploring Cronbach’s Alpha for multi-item surveys with non-binary scoring, comparing KR-21 against KR-20 for more precise reliability estimates, and using the Excel Data Analysis Toolpak for correlation matrices on larger datasets. But for most classroom teachers, the method in this guide covers everything you need to start making data-driven decisions about your tests today.